Pleached Screen installation and care guide
Pleached Screen trees are individually trained trees. Installed at one-metre centres, they create a continuous elevated screen, with clear space below the foliage.
This guide covers installing and caring for your Pleached Screen in the ground, in containers or in planter boxes.
Before installation begins, make sure the person installing your Pleached Screen has read this guide, particularly the drainage and planting depth guidance.
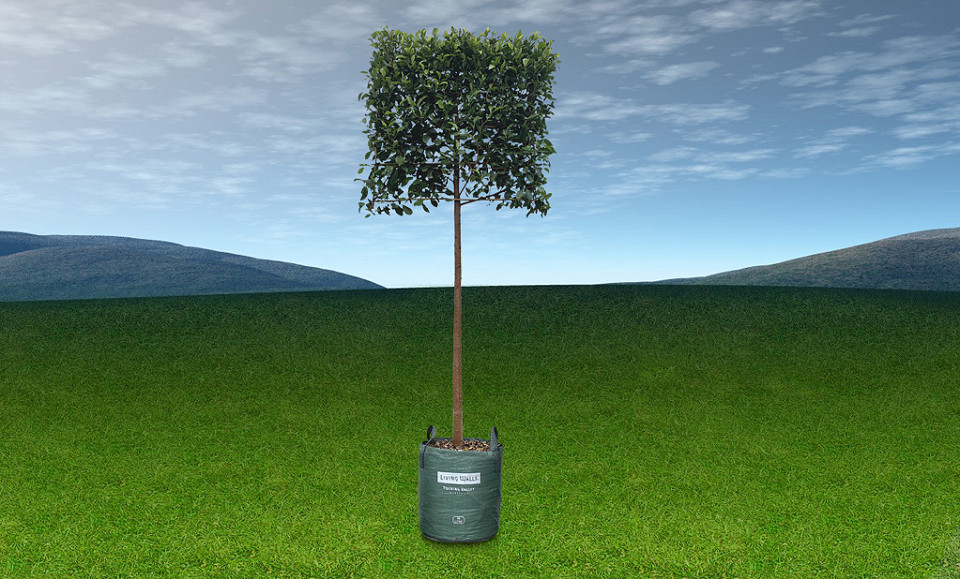
Diagram: Pleached Screen tree in a 45L round planter bag
Before you start
Handling your trees
- Safe lifting: Use both handles to lift the bag. Avoid lifting the tree by its trunk or frame.
- Weight and handling: Pleached Screen trees can weigh up to 45 kg each when wet. One or two capable people can carry them around the site, or use a dolly or wheelbarrow.
In-ground installation
Pleached Screen trees can be installed in individual holes or in a continuous trench. Individual holes are usually the simplest option. A continuous trench may be easier where machinery or site conditions suit it.
Check the site and drainage
Pleached Screen trees need soil that holds sufficient moisture while allowing excess water to drain away.
Check drainage before digging your planting holes or trench. Look for standing water, ground that remains saturated after rain, or water flowing into the proposed planting area. Conditions may vary along the screen line, particularly at low points.
Carry out drainage checks at several points along the proposed planting area. See How to check and improve drainage before installing your hedge for the method and guidance on addressing problems.
Resolve drainage problems before installation. Raised planting can help in some conditions, but it does not replace drainage improvements where the site remains waterlogged.
Plan the installation
- Mark the positions: Allow one metre between the centres of neighbouring trunks.
- Prepare ahead: If practical, prepare the planting area before your trees arrive. Check for underground services, roots and other obstacles before excavation. Once you know the site conditions and required planting depth, prepare the holes or trench.
- Plan the support: Decide how you will support the trunks and frames, and have the stakes, wire and ties ready. See Staking and frame support below.
- Backfill soil: Ideally, use the soil excavated from the holes or trench. This keeps conditions consistent with the surrounding ground as roots grow out into it and avoids creating a pocket of different soil that can affect how water moves through the planting area. If you’ve removed large plants or roots or otherwise don’t have enough soil to backfill, bring in good-quality topsoil.
- Root control: For vigorous-rooted varieties such as Ficus tuffi, consider a 600–900 mm deep root barrier where roots need to be directed away from pipes, paths or other structures. Install any required root barrier before placing the trees in the holes or trench.
STANDARD HOLE AND TRENCH DIMENSIONS
For 45L Pleached Screen trees in well-drained soil:
- Individual holes: 500–600 mm diameter × approximately 400 mm deep.
- Continuous trench: 400 mm wide × approximately 400 mm deep × total screen length.
Check the actual rootball height and use the depth guidance below before digging. See our specifications for further dimensions.
INSTALLATION DEPTH ADJUSTMENTS
- Well-drained soil: Dig to approximately the height of the rootball, so its top sits level with the surrounding ground.
- Heavy clay or sites requiring raised planting: Where drainage has been assessed and addressed, dig the holes or trench about one-third shallower than the rootball height, so the rootball sits about one-third above the surrounding ground. For a rootball approximately 400 mm high, dig to about 270 mm deep.
For raised installations, cover the exposed sides of the rootball with soil, sloping it down to the surrounding ground. Keep soil off the top of the rootball and away from the trunk.
If the site has persistent waterlogging or a high water table, seek drainage advice before installation.
DIG AND PREPARE THE HOLES OR TRENCH
- Dig to the width and depth established above.
- Set aside the excavated soil for backfilling.
- Roughen compacted or smooth sides of the holes or trench to help roots grow into the surrounding soil.
- If you need to add soil beneath a rootball to adjust its height or level the frames, firm that soil before placing the tree so it does not settle after installation.
- Do not add extras such as gravel, compost, manure, water crystals or fertiliser to the holes or trench. Gravel does not provide an outlet for trapped water. Compost and manure break down over time, which can cause the tree to sink, and may be too rich for new roots. Fertiliser can damage roots at this stage, so apply it over the root zone later.
Install the trees
- Remove the bag. Cut open two sides of the bag and gently free the rootball. Remove the bag completely. Keep the rootball intact and support it from underneath when moving it into position.
- Position the trees. Place them at one-metre centres. Check the planting depth and keep the trunks upright. Decide which way the frames will face, and keep this consistent across all trees.
- Check the alignment and position stakes. Adjust the trees so the frames are level and aligned and the foliage meets to form a continuous elevated screen. Where ground stakes are needed, position and drive them outside the rootballs before backfilling. See Staking and frame support below.
- Backfill halfway. Use the soil set aside during excavation. Firm it gently around the rootballs without over-compacting it, then water lightly to settle the soil.
- Finish backfilling. For raised installations, cover the exposed sides of the rootballs with soil, sloping it down to the surrounding ground. Keep soil off the tops of the rootballs and away from the trunks.
- Water thoroughly. Slowly apply up to 20 litres of water per tree as the initial watering, allowing it to soak into the rootball and surrounding soil.
- Secure the trees and frames. Complete the support system so the rootballs do not rock and the frames remain level and aligned.
Installation in containers or planter boxes
CONTAINER DIMENSIONS
For 45L Pleached Screen trees, the minimum internal dimensions are:
- Rectangular: 900 mm long × 400 mm wide × 450 mm high.
- Cylindrical: 600 mm diameter × 450 mm high.
- Square: 600 mm long × 600 mm wide × 450 mm high.
Larger containers provide more room for root growth and hold more mix and moisture. Check the actual rootball size when choosing your container.
PLAN AND PREPARE THE INSTALLATION
- Spacing: Where several trees share a planter to form a continuous screen, allow one metre between the centres of neighbouring trunks.
- Enclosed containers: Containers must have drainage outlets that allow excess water to escape freely. Use a quality container mix under and around the rootball.
- Open-bottom planters: Use suitable garden mix or topsoil under and around the rootball. Check that the ground beneath the planter also drains freely. An open base will not resolve waterlogging in the soil below. See How to check and improve drainage if needed.
- Support: Decide how you will support the trunks and frames, and have the materials ready. Use a support system suited to the container, planter or adjacent structure. See Staking and frame support below.
- Irrigation: Arrange reliable watering from installation onwards. Trees in enclosed containers or planter boxes will usually require permanent irrigation.
- Do not add gravel, compost, manure, water crystals or extra fertiliser at installation. Nutrients already incorporated into a quality container mix are acceptable.
Install the trees
- Remove the bag. Cut open two sides of the bag and gently free the rootball. Remove the bag completely. Keep the rootball intact and support it from underneath when moving it into position.
- Set the height. Add mix beneath the rootball as needed so its top sits approximately 50 mm below the container rim, level with the finished mix surface. This leaves space for watering and mulch..
- Position and align. Keep the trunks upright. Decide which way the frames will face, and keep this consistent across all trees. For a continuous screen, check the one-metre spacing between trunks and adjust the trees so the frames are level and aligned before filling.
- Fill around the rootball. Add mix halfway up and firm it gently. Water lightly to settle it, then finish filling. Keep mix off the top of the rootball and away from the trunk.
- Water thoroughly. Apply water slowly so it wets the rootball and surrounding mix. In enclosed containers, excess water should flow out through the drainage holes. If water pools without draining, check that the holes are clear and the outlets are not obstructed.
- Secure and irrigate. Complete the trunk and frame support, and set up the irrigation or watering arrangements.
Staking and frame support
Pleached Screen trees need support while their roots establish. Their elevated framed foliage can catch the wind, so the support system must both prevent the rootballs from rocking and keep the frames level and aligned.
Use soft tree ties for trunks. Allow slight trunk flex without allowing the tree to rock in the ground. Keep wires and other abrasive materials from rubbing against trunks or branches.
- Fence or wall support: Where suitable, secure the frames to a horizontal wire attached to a sound fence or wall.
- Stake-and-wire support: Install suitable stakes, such as Waratahs, on the sheltered side of the screen and run horizontal wire between them to support the frames.
- Individual tree staking: Where needed for in-ground trees, use two 1.8 m stakes, positioned approximately 100 mm outside the rootball, and secure the trunk with soft ties. Drive the stakes firmly into the ground before backfilling.
- Check regularly: Check stakes, wires and ties as the trees grow and after strong winds. Adjust anything that has loosened, become too tight or begun rubbing.
- Remove temporary support when established: Remove staking once the trees remain upright and stable without it. Timing will depend on the site and growing conditions.
- Bamboo frames: Leave the frames in place while the trees establish and the foliage develops. They will gradually break down and can be removed later if no longer needed.
Watering
Deep, consistent watering is important while Pleached Screen trees establish, particularly during their first two growing seasons. Continue checking moisture throughout the year, with closer attention during warm, dry or windy weather.
For multiple trees, we recommend dripper irrigation with emitters positioned to water each rootball. Pleached Screens in enclosed containers or planter boxes will usually require permanent irrigation.
As a starting point during establishment in warm, dry weather:
- Water deeply every two to three days.
- Ficus tuffi may require up to 15 litres per tree per watering in some conditions.
- Other varieties may require approximately 5–10 litres per tree per watering.
These are starting points rather than fixed rules. Requirements vary with the variety, soil or container mix, season and weather.
Check moisture approximately 50 mm below the surface of the rootball, as well as in the surrounding soil or mix. It should feel moist, but not soggy. Adjust both the amount and frequency of watering accordingly.
Once established, in-ground trees may still need additional water during prolonged dry or windy conditions. Trees in containers will continue to depend on regular watering.
Feeding and mulching
Feeding
Regular feeding helps maintain healthy growth and foliage.
Use a complete granular NPK fertiliser, such as Nitrophoska®, Nitro Blue or Triabon®, following the directions for the product and planting situation.
As a general guide, feed in early spring and again in mid-summer. Approximately 50 g per tree may be suitable, but the product’s recommended rate takes precedence, particularly for trees in containers.
Spread fertiliser evenly over the root zone, keeping it away from the trunk and foliage. Water it in according to the product directions.
Once an in-ground Pleached Screen is fully established and has reached the size you want, feeding can generally be reduced to once a year in early spring. Trees in enclosed containers or planter boxes will usually continue to benefit from regular feeding according to the fertiliser directions.
Mulching
After installation, apply up to 50 mm of organic mulch over the root zone.
Mulch helps retain moisture, suppress weeds and improve the soil as it breaks down. Keep it clear of the trunk and do not use fresh grass clippings.
In containers, use a thinner mulch layer where needed to leave watering space below the rim.
Refresh mulch as needed, particularly after feeding.
Trimming and training
How often you trim will depend on the variety, season and the size and finish you want.
Most evergreen Pleached Screens benefit from two to three light trims during the growing season, from spring to early autumn. Regular light trimming helps maintain dense, even foliage and the shape of the canopy.
If you are allowing the screen to grow taller or broader, continue trimming new growth lightly to encourage density as the canopy develops.
- Flowering varieties: Trim after flowering where you want to preserve the flowers.
- Deciduous varieties: Shape during winter while dormant, with a light trim during the growing season if needed.
- Training new growth: Where needed, tie suitable new shoots into the frame to help fill and maintain the screen. Check ties as the shoots thicken.
- Clear stems: Remove unwanted shoots below the canopy while they are small.
Ongoing care
Continue checking watering, support, feeding and trimming as your Pleached Screen establishes and matures.
Keep the root zone reasonably clear of weeds.
For more information on routine care, weed control and troubleshooting, see our Living Walls™ care and maintenance guide.