Pleached Screen installation & care guide
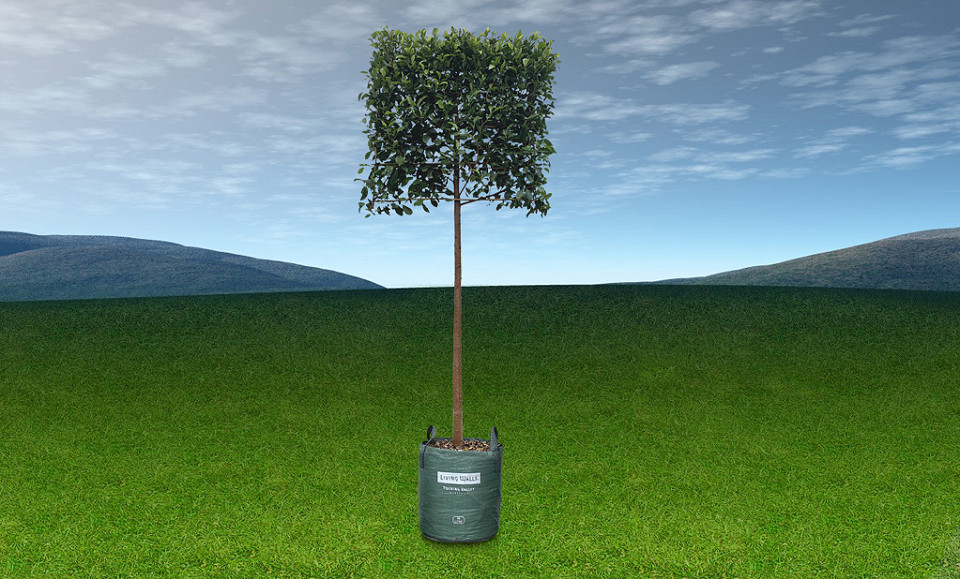
Pleached Screen trees are individually trained trees installed at one-metre centres to create a continuous elevated screen, with clear space below the foliage.
This guide covers installing and caring for your Pleached Screen.
Please make sure whoever is installing your Pleached Screen reads this guide before installation begins and follows the instructions throughout.
Before You Start
Handling Guidelines
- Safe lifting: Use both handles to lift the bag. Avoid lifting the tree by the trunk.
- Weight considerations: Pleached Screen trees can weigh up to 45 kg when wet. One or two capable people can carry them around the site, or use a dolly or wheelbarrow.
Installing Your Pleached Screen
In-Ground Installation
Pleached Screen trees can be installed in individual holes or in a continuous trench. IIndividual holes are usually the simplest option. A continuous trench may be easier where machinery or site conditions suit it.
Site Prep Tips
- Plan ahead: If practical, prepare your holes or trench before your Pleached Screen arrives. This gives you time to identify underground obstacles, check drainage and confirm the required screen length.
- Extra soil: If you’ve removed large plants or roots and don’t have enough soil to backfill, bring in good-quality topsoil.
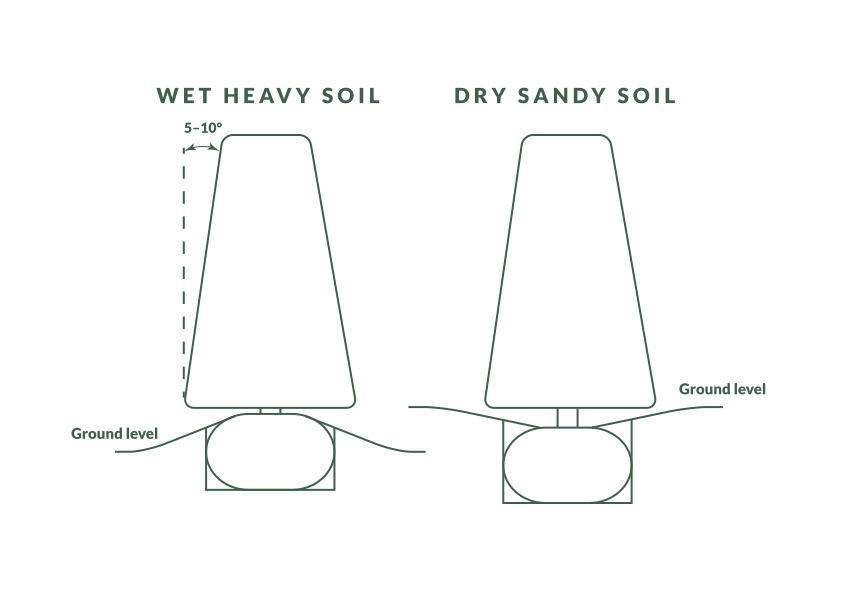
- Check drainage: Pleached Screen trees need soil that drains well and does not remain saturated for long periods. Check drainage at several points along the installation area, especially at the lowest points. Fill the holes or trench with water and check again after a couple of hours. If water remains, improve the drainage first and follow the WET HEAVY SOIL installation detail below.
- Root control: For vigorous-rooted varieties such as Ficus tuffi, consider installing a 600–900 mm deep root barrier where roots need to be kept away from pipes, paths or other structures. Install the barrier before placing the Pleached Screen trees.
INSTALLATION DEPTH ADJUSTMENTS
- Well-drained soil: Set the top of the rootball level with the surrounding ground.
- Heavy clay soil, wet sites or high water tables: Raise the rootball about one-third above ground level. Cover the exposed sides of the rootball with soil, sloping it down to the surrounding ground. Keep soil away from the tree trunks. See the WET HEAVY SOIL diagram.
- Light sandy soil or when installing your Pleached Screen across a steep site: Dig slightly deeper and set the rootball just below ground level. Keep soil away from the tree trunks. See the DRY SANDY SOIL diagram.
Installation steps
- Dig individual holes 400 mm deep × up to 600 mm wide, or use a continuous trench 400 mm deep × 400 mm wide where machinery or site conditions make that easier. Adjust the depth where needed according to the installation depth guidance above.
- Set aside enough soil for backfilling. Loosen compacted soil at the bottom and sides of the holes or trench with a spade to help roots grow into the surrounding soil.
- Don’t add extras such as gravel, compost, manure, water crystals or fertiliser to the holes or trench. Gravel can worsen drainage problems. Compost and manure break down over time, which can cause the tree to sink, and may be too rich for new roots. Fertiliser can damage roots at this stage, so apply it on top later.
- Prepare the rootball: Water it well while still in the bag. Cut two sides of the bag to gently free the rootball.
- Position the trees: Place the rootballs in the holes or trench at one-metre centres, keeping the trunks upright and the frames level and facing the same way, so the framed foliage meets to create a continuous elevated screen.
- Adjust the trees until they are aligned, then backfill halfway with the soil you set aside and pack it gently around the rootballs. Water to settle the soil, finish backfilling, then slowly apply up to 20 litres of water per tree as the initial watering.
- Stake your Pleached Screen: See the staking guidance below.
In Containers or Planter Boxes
Where Pleached Screen trees are being installed together to form a continuous screen, install them at one-metre centres.
- Large containers: See Specifications for the minimum internal container dimensions required for 45L Pleached Screen trees. Use a quality container mix under and around the rootball. Do not add gravel, compost, manure, water crystals or fertiliser to the container at installation. Follow the relevant installation steps above.
- Open-bottom planters: Use free-draining garden mix or topsoil under and around the rootball, and make sure the soil below the planter also drains freely. Do not add gravel, compost, manure, water crystals or fertiliser at installation. Follow the relevant installation steps above.
Staking
Stake Pleached Screen trees after installation to keep the trunks upright while the roots establish, and secure the frames so they remain level and aligned. The framed foliage can catch the wind. Both trunks and frames should have little to no movement.
- Fence or wall support: Where suitable, secure the frames to a horizontal wire attached to the fence or wall.
- Stake-and-wire support: Install stakes, such as Waratahs, on the sheltered side of the screen and run horizontal wire between them to support the frames.
- Individual tree staking: Where needed, use traditional tree staking with two 1.8 m stakes positioned about 100 mm from the rootball and secure the trunk loosely with soft ties.
- Check regularly: Make sure stakes, wires and ties remain secure and are not rubbing or damaging the trees. Adjust them as the trees establish.
- Remove support when established: Temporary staking can be removed once the roots are well established and the trees remain upright and stable without support. Timing will vary with the site and growing conditions.
- Frames: Leave the bamboo frames in place while the trees establish and the foliage develops. They will gradually break down over time and can be removed later if no longer needed.
Watering
Deep, consistent watering is important while Pleached Screen trees establish, particularly through their first two growing seasons from spring to mid-autumn. Once established, they may still need additional water during prolonged dry or windy conditions.
Keep the root zone moist but not soggy. Check the soil regularly rather than relying only on a watering schedule, as requirements will vary with the variety, soil, season and weather.
For multiple Pleached Screen trees, we recommend dripper irrigation with emitters placed in each rootball. Pleached Screens growing in enclosed containers or planter boxes will usually require permanent irrigation.
As a general guide during establishment and warm, dry weather, water deeply every two to three days. Ficus tuffi may require up to 15 litres per watering in some conditions, while other varieties may need around 5–10 litres.
These are starting points rather than fixed rules. Check the soil about 50 mm below the surface and adjust the frequency if needed. It should feel moist, not dry or soggy.
Feeding and Mulching
FEEDING
Regular feeding helps maintain healthy growth and foliage.
Use a complete granular NPK fertiliser, such as Nitrophoska®, Nitro Blue or Triabon®, following the product directions.
As a general guide, feed in early spring and again in mid-summer. Apply approximately 50 g per Pleached Screen, spread evenly over the root zone.
Keep fertiliser away from the trunk and foliage and water it in after application.
Once an in-ground Pleached Screen is fully established and has reached the size you want, feeding can generally be reduced to once a year in early spring. Pleached Screens growing in enclosed containers or planter boxes will usually continue to benefit from feeding twice a year.
MULCHING
After feeding, apply approximately 50 mm of organic mulch over the root zone.
Mulch helps retain moisture, suppress weeds and improve the soil as it breaks down. Keep mulch clear of the trunk and refresh it as needed.
Trimming and Training
How often you trim will depend on the variety, the season and the size and finish you want.
Most evergreen Pleached Screens benefit from two to three light trims during the growing season from spring to mid-autumn. Regular light trimming helps maintain dense, even foliage and the shape of the pleached canopy.
If you are allowing the screen to grow taller or broader, continue to trim new growth lightly to encourage density as the canopy develops.
- Flowering varieties: Trim after flowering where you want to preserve the flowers.
- Deciduous varieties: Shape during winter while dormant, with a light trim during the growing season if needed.
- Training new growth: Where needed, tie suitable new shoots into the frame to help fill and maintain the screen.
- Clear stems: Remove unwanted shoots that develop from the trunk below the pleached canopy while they are small.
Ongoing Care
Continue to monitor watering, staking, feeding and trimming as your Pleached Screen establishes and matures.
Keep the root zone reasonably clear of weeds, particularly while the trees establish. For more detailed information on routine care, weed control and troubleshooting, see our Living Walls™ Care & Maintenance Guide.